How to Install Narva Plug 'n' Play Trailer Light Kits
— December 13, 2021 | 2 min read
Old, busted, or temperamental trailer lights are a right royal pain – and illegal! Worse still, taking your trailer to an auto electrician to get the lights fixed can be costly and inconvenient. That’s all in the past with Narva’s innovative Plug ‘n’ Play trailer lamp kits. With two different kits to suit standard ‘6 x 4’ and ‘7 x 5’ box trailers, as well as a waterproof kit (IP68 rated), for boat trailers where submersion is common.
All of our kits comply with Australian lighting standards and are a breeze to install as everything is pre-wired and simply plugs together. The installation does not require any stripping, splicing, or crimping of wiring. Nor are there any intricate electrical connections to get wrong. It’s a straight-forward DIY project that you can complete in an afternoon.
In this post, we’ll cover how to install the Model 35 square trailer lamp kit. However, you can use this as a guide for installing any of our Plug ‘n’ Play trailer light kits.
Tools for the job:
- Power drill and drill bits
- 30mm step-drill
- Spanners
- Phillips head screwdriver
- Side cutters (diagonal pliers)
Step 1 – Remove old trailer lights & wiring
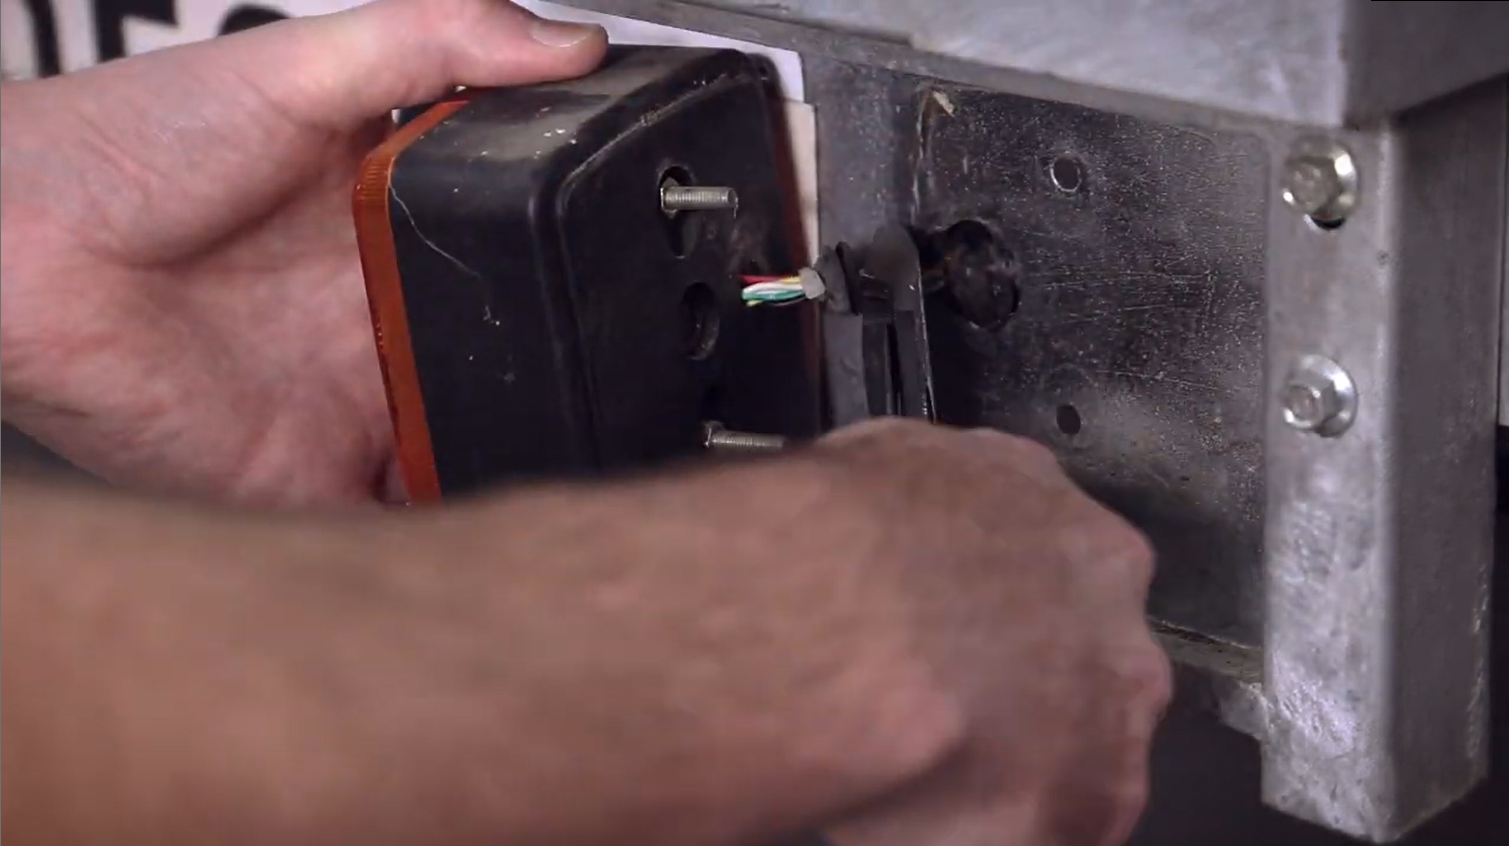
Hook your trailer up to your car – make sure it’s in park and with the handbrake on. This will hold the trailer steady while you work on it. Now, remove the old trailer lights. You'll need your side cutters to cut the lights from the cable. You can then pull out all of the old cabling.
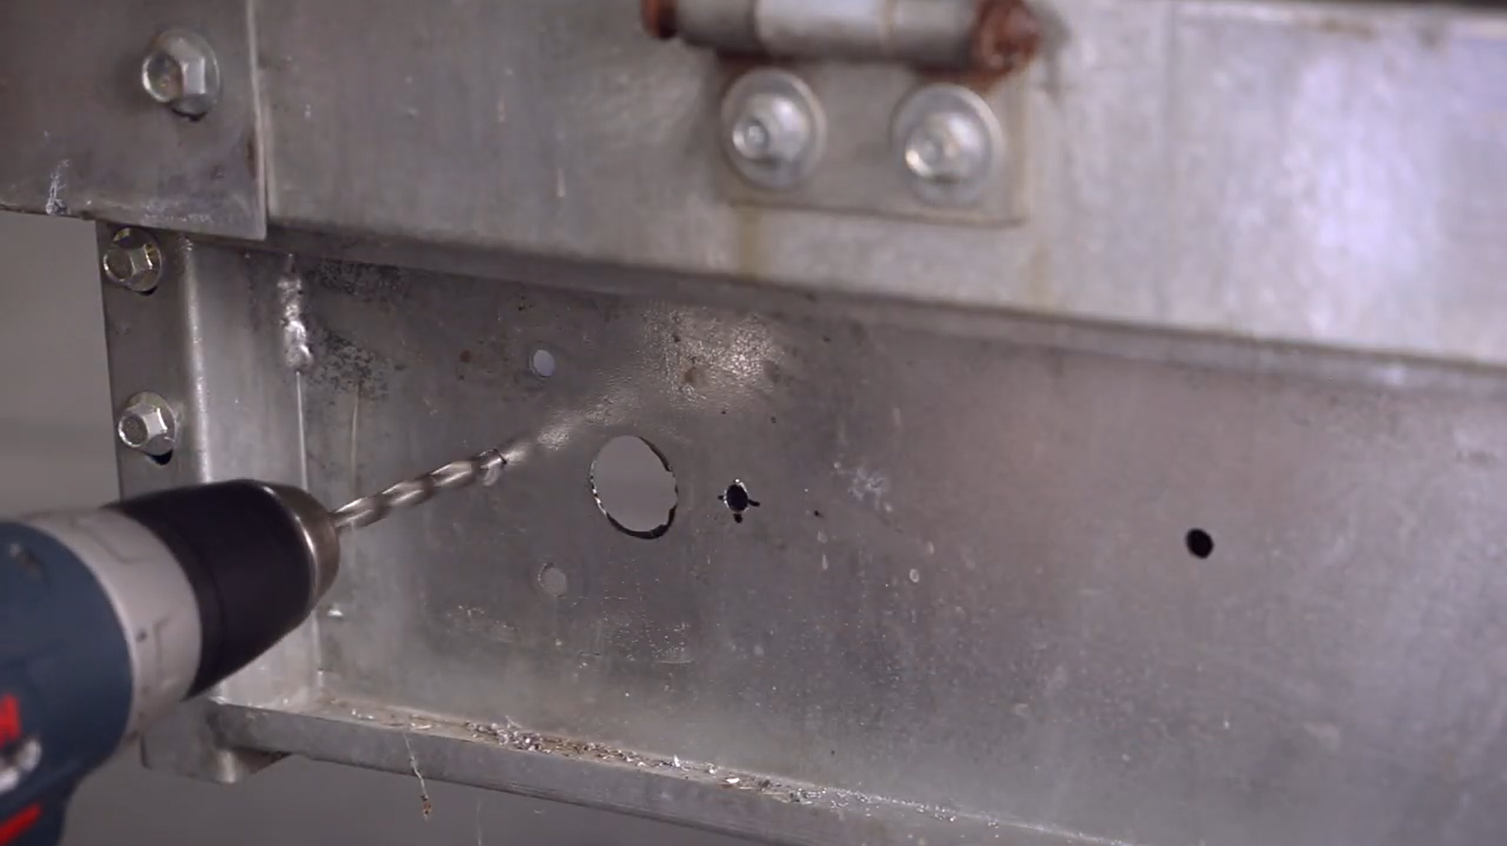
Step 2 – Measure and drill new holes into the trailer (if necessary)
It’s best to start the installation at the back and work forward. To mount the new LED lamps, you may need to drill new mounting holes into the trailer, along with an access hole to route the moulded plugs and cabling through. Carefully measure and drill any new holes that you need.
Tip: Use a step drill for drilling larger holes in sheet metal.
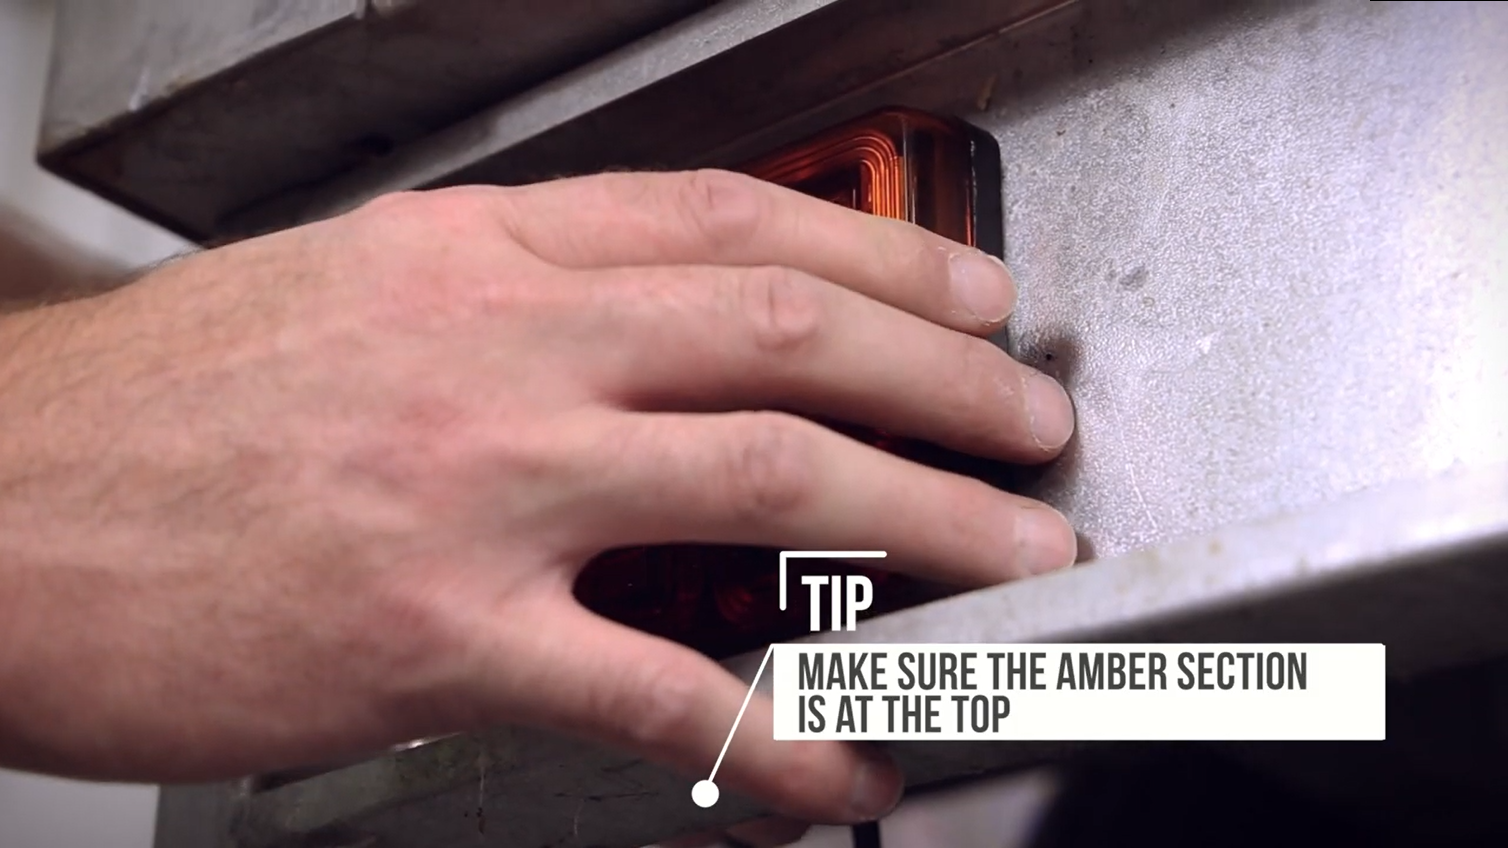
Step 3 – Install the new lights and secure in place
Position the two rear lamps in place and feed their wires through the holes. Tightly secure the lamps in place using the supplied nuts and washes in the lighting kit.
Tip: Make sure the amber section is at the top.
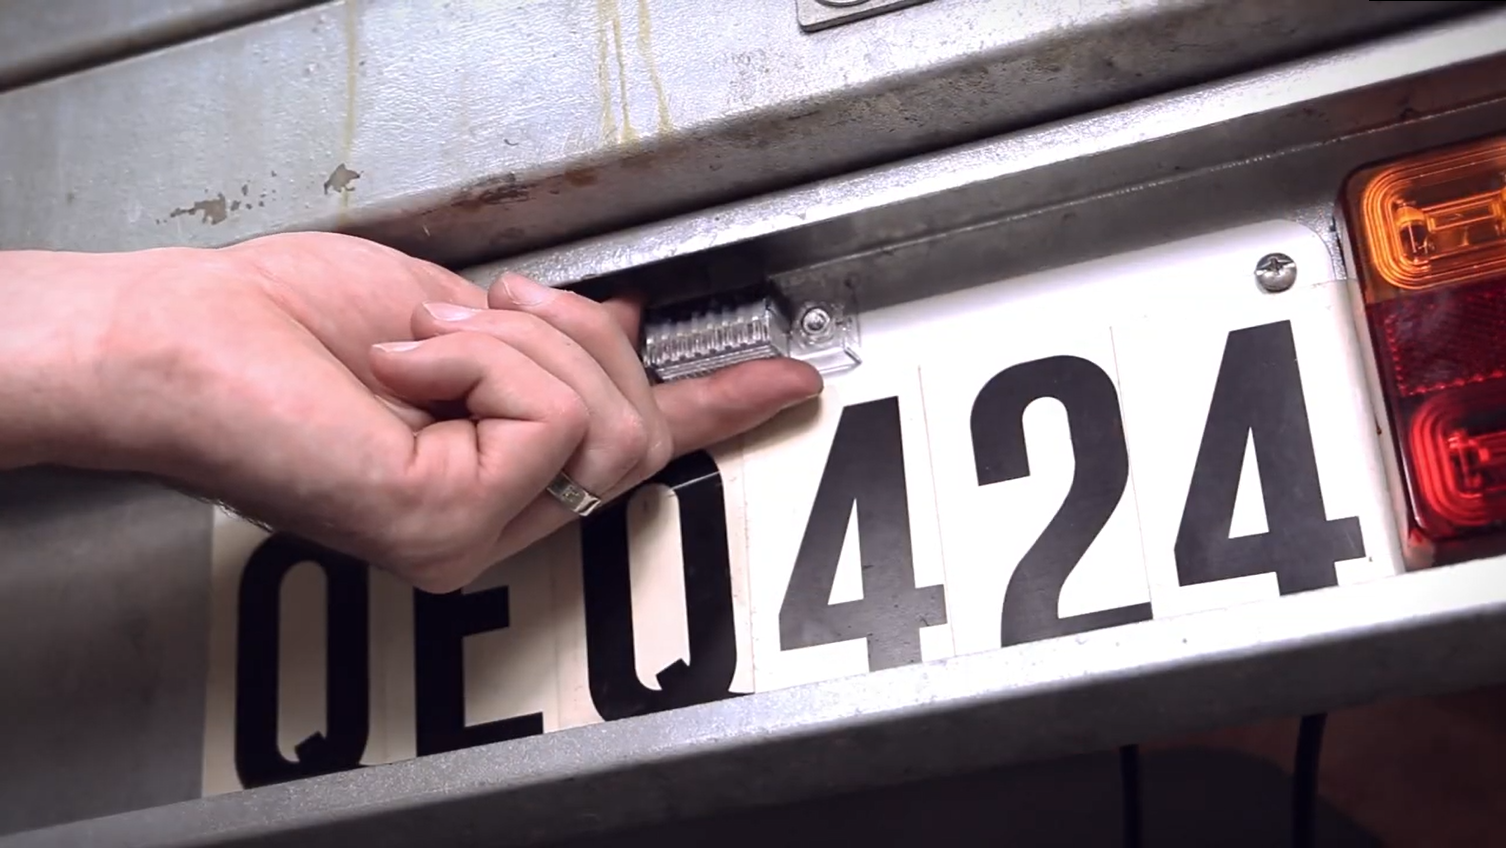
Step 4 – Install the Licence plate lamp
Drill a hole for the licence plate lamp above the licence plate. Remove the licence plate lamp cover, then mark and drill holes for the screws. Secure the lamp in place and replace the cover.
Step 5 – Connect the lamp wires to the main harness
The two stop/tail/blinker rear lamps and separate number plate light are all pre-wired and connect to the main harness using secure, weather-proof plugs. The plugs can only go together one way. Just line the small arrows up and push the plugs together and tighten the locking collar. Wiring doesn’t get much easier than that.
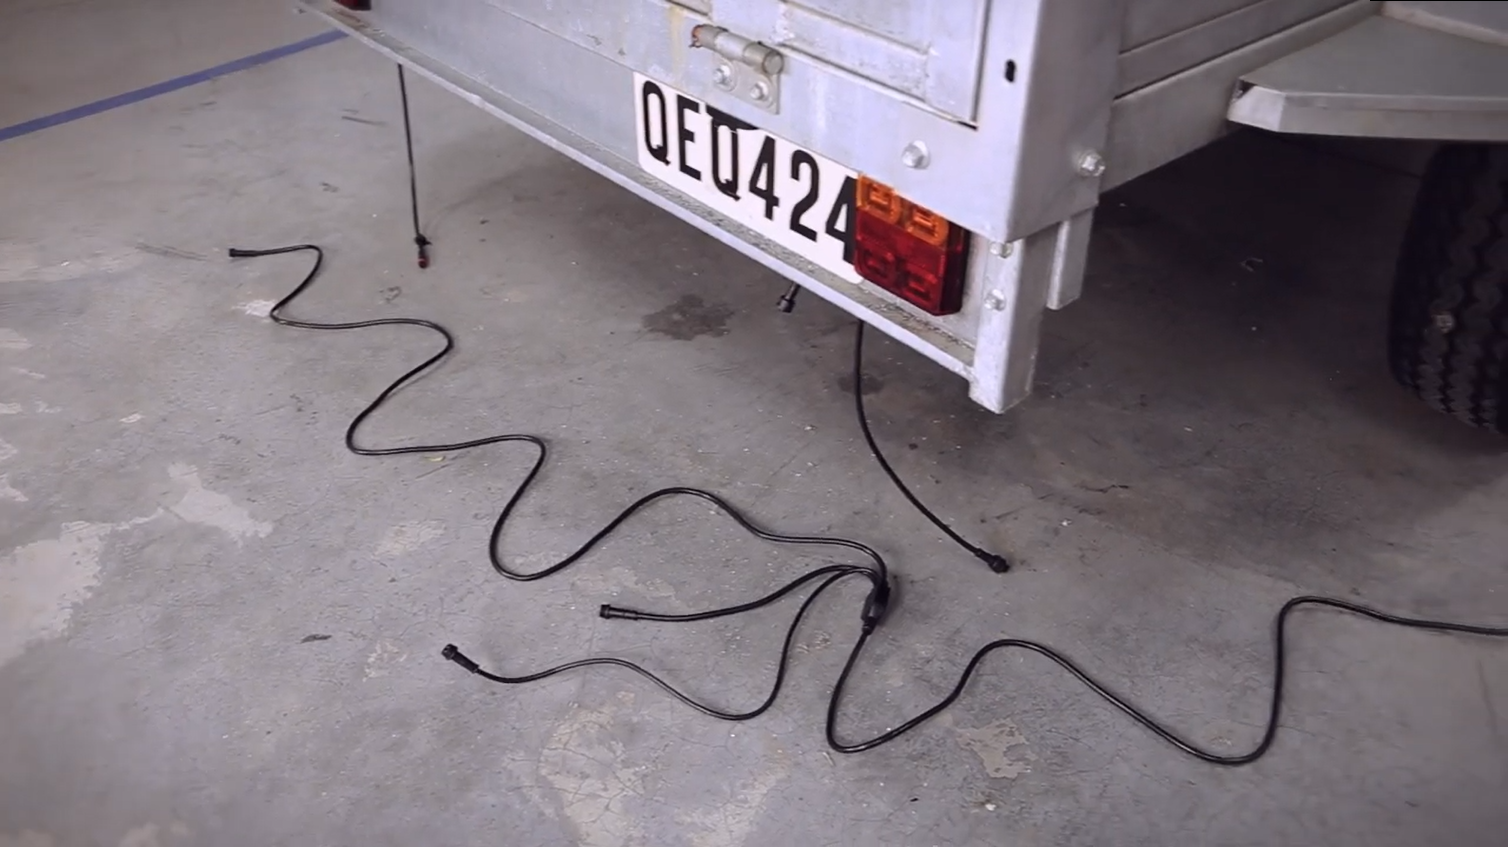
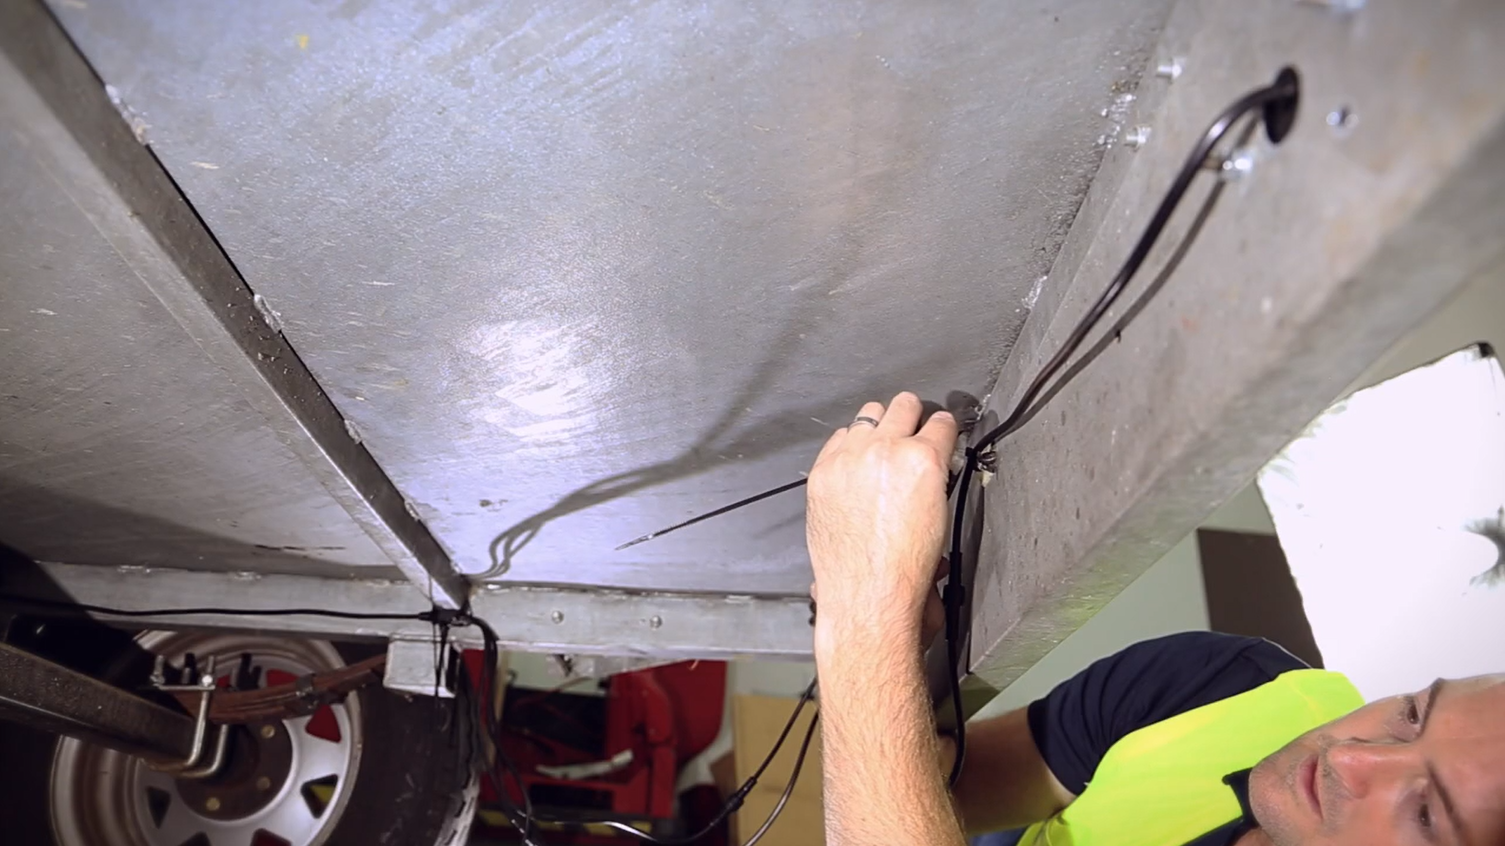
Step 6 – Secure the wiring under the trailer
Route the new main harness under the trailer up to the front. Secure the wiring every 300mm using clips, saddles or cable ties. It’s important than none of the wiring hangs down. This will stop it from getting caught up on things, which has the potential to tear out your new wiring.
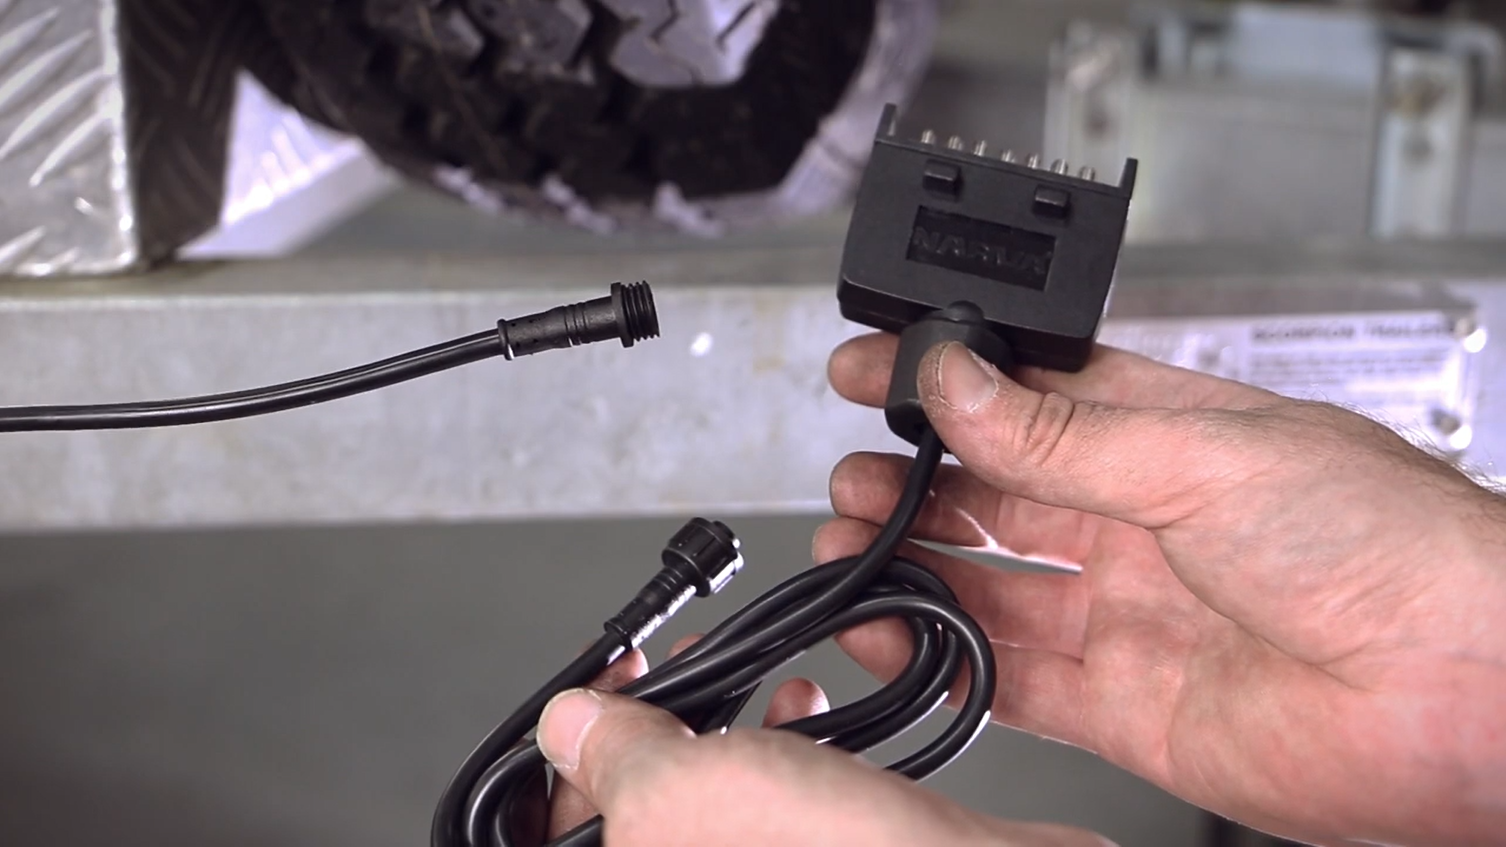
Step 7 – Connect the trailer plug to the main harness
Narva’s Plug ‘n’ Play trailer lamp kits come with the two common trailer plugs – 7 pin round and 7 pin flat. Each is pre-wired with a 1m lead that connects to main harness using the same secure weather-proof plug as the rear lamps. Unravel the cable and connect to the main harness.
Tip: The lead running from the trailer to the car needs enough slack to allow the trailer to fully articulate without pulling on the cable. It’s also a good idea to leave sufficient length to accommodate other vehicles whose trailer pug may be located slightly further away. However, don’t make the lead so long that the excess lead drags on the ground. The lead must also be firmly affixed to the trailer to stop the main harness being pulled out of place. A saddle, or P-clamp works well for this.
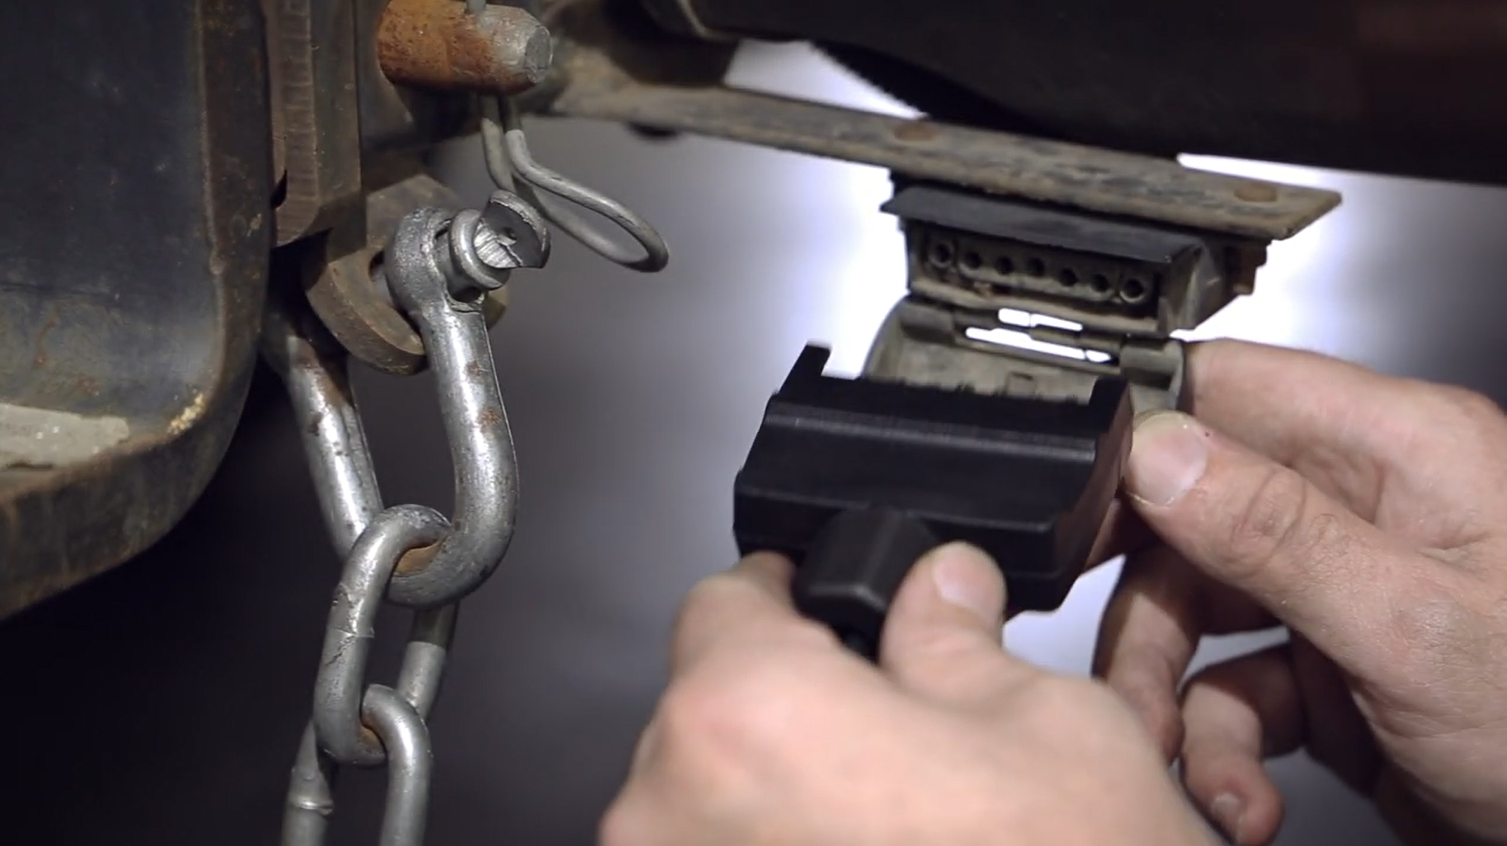
Step 8 – Plug into your vehicle’s trailer socket and test out your new lights!
The last thing to do is plug in your newly wired trailer into your vehicle’s trailer socket and check that everything is operating correctly. Whether you’re checking a newly installed kit, or your existing lights, testing is best done with an observer. Start with the taillights – be sure to double check the number plate light is working and is throwing light down onto the number plate. With the taillights still on, apply the brakes. Verify the lights get brighter when the brake is applied and the tail lights remain illuminated when the brake lights are on. It might be necessary to cycle the brakes on-and-off a few times to independently verify correct operation of both sides. When testing the blinkers, it is again advisable to leave the taillights on and cycle the brake pedal all at the same time. This will confirm proper operation and earthing of all lamps, as well as correct illumination intensity.
Watch the full installation video below.
Related products
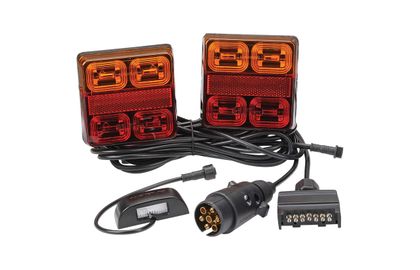
12V MODEL 35 LED PLUG AND PLAY TRAILER LAMP KIT (SQUARE LAMPS)
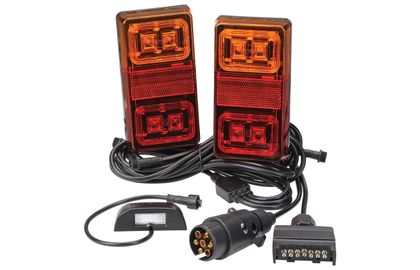
12V MODEL 35 LED PLUG AND PLAY TRAILER LAMP KIT (RECTANGULAR LAMPS)
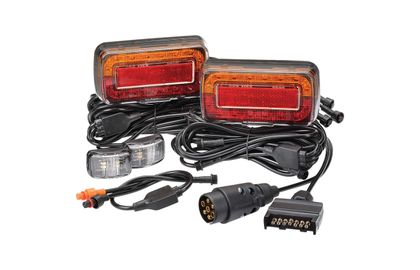
MODEL 37 12V LED PLUG AND PLAY TRAILER LAMP KIT (SUBMERSIBLE) FOR BOAT TRAILERS