Automotive Wiring 101
— October 04, 2021 | 2 min read
Good wiring practice is not only essential for keeping that newly-installed accessory operating reliably, it also ensures your DIY wiring doesn’t create other problems. This can range from stopping your vehicle from operating through to electrical fires in extreme cases. However, by following a few basic guidelines and equipping yourself with the right tools, anyone can safely complete basic DIY auto electrical installations.
Choosing the right wire guage
Selecting the correct wire gauge (or thickness) is all about current draw – the more current a device uses, the heavier the gauge cabling it requires. Power hungry things like driving lights, fridges, solar panels and pumps require thick, heavy gauge wire. While low current devices such as warning lights, LED interior lights, side marker lights and USB ports only require light gauge wire.
Standard automotive cable sizes (cable diameter) and their maximum current ratings are: 2mm (4amp), 3mm (10amp), 4mm (15amp), 5mm (25amp) and 6mm (50amp). Above this and you’re into battery and starter (B&S) territory – which uses a different system. Dual battery set-ups, auxiliary alternators and electric winches all require battery-style cables.
Narva have an extensive range of automotive cable, including handy retail sized automotive and B&S packs which are perfect for your DIY install.
Stripping cable
When joining two wires together or terminating a wire, it is vital to strip back the insulation for a low resistance, long lasting connection. Investing in a good pair of wire strippers is a must. Automotive cable is made up from many fine strands of copper, which keep the cable flexible. Improperly adjusted wire strippers, or poor-quality wire strippers will often sever or break some of these individual strands – which reduces the cable’s cross-sectional area (aka: size/gauge).
Splicing wires
When it comes to splicing wires together, there are many different methods available. Our preferred way to create a safe and reliable electrical connection is to crimp or solder the wires together.
If you’re terminating the wire with a connecter, strip just enough insulation away so that no copper wire protrudes out of the connector. Be careful when inserting the wire into the crimp connector, as stray strands of wire love piercing the insulation of other wires, which can create a short. Use a good set of Narva crimpers to create a secure lasting crimp – never crimp with pliers or vice grips.
When splicing two wires together, never twist and tape, or use a scotch lock – such connections are destined to fail. To splice two wires together, strip back the insulation about 15-20mm, neatly twist the two wires together, crimp or solder the bundled wires, then insulate with either electrical tape or heatshrink.
The key to a good, soldered joint is lots of heat, really quickly. If you’re soldering big wires, you need a quality soldering iron. If takes a long time to get the wire/terminal hot enough to melt the solder, you run the risk of the solder running up the wire – which makes it stiff and renders it prone to vibration failure. Lots of heat really quickly keeps the solder very localised – which is exactly where you want it. Check out our dedicated soldering blog and how-to video for more hints and tips on the art of soldering.
Another popular way of lengthening or joining two wires together is to use a cable joiner (also known as butt connectors). This quick and easy connector makes crimping cables a breeze and features built-in heatshrink with adhesive for weatherproof sealing and strain relief. If you are planning on undertaking multiple DIY electrical jobs, why not invest in one of our DIY Terminal Assortment Kits, which come with our Tradesman plier type crimping tool and 200 of the most popular blade, bullet and cable joiner terminals.
Sealing & insulation
Exposed copper wire and non-insulated connectors create the potential for a short to occur. While insulation tape does a great job, heat shrink adds additional insulation, while giving your connections a professional looking finish.
One area where it’s difficult to use heat shrink is when splicing into an existing wire. Here tape is the best option. Unlike when taping multiple wires into a loom (with a wrapping action, at around 50% overlap), when using tape to insulate a connector or splice join, you need a minimum of two, to three layers of tape on all areas to ensure its properly insulated. Slightly stretching the tape during application will help it stay securely in place.
Heatshrink offers a couple of additional benefits to tape. As an insulator, its typically a good bit tougher than electrical tape. Dual wall heatshrink combines an increased wall thickness with adhesive to create an even stronger, waterproof seal. A heat gun is the tool of choice for shrinking heatshrink, however judicious use of a blow torch or cigarette lighter can also work. Just don’t get things so hot that it scorches the adjacent insulation. PRO TIP: when adding heatshrink to battery terminals, use red heatshrink for the positive cables and black heatshrink for the negative. It’s a great visual reminder of which cable goes where.
Harness protection and organisation
Corrugated split sleeve tubing or conduit is not only a great way to bundle multiple wire runs together to keep your cabling neat and tidy, it also offers significant additional protection. Wire’s PVC insulation is relatively soft and easily damaged by sharp metal edges, elevated temperatures and vibration when resting against bolts, brackets and other protrusions. Narva offers many different sizes of split tubing in convenient lengths. If you’re contemplating doing any wiring, its recommended you have a few different sizes on hand.
Another option for cable management and protection is to bundle your harness together with harness tape (also called harness cloth) or spiral wrap. This can be a quick and easy way of getting that neat OEM finish and cable protection, with the added benefit of reducing the harnesses diameter.
Securing your cables
The number one rule with wiring; ‘if you can pull the wiring across to things that get hot, or things that spin, the harness will find its way there all by itself.’ All wiring must be secured out of harm’s way. Same again if you’ve run wiring under the car. If it hangs down, it can easily get caught up and ripped out. Cable ties are the most common method of securing electrical wiring. However insulated P-clips (also known as saddle clamps), along with Chassis Clips also work great.
As well as traditional cable ties in various sizes, Narva also has a couple of other options that can be life savers. Their cable ties with an eyelet on the end (mountable head), can be secured in place with a self-tapping screw or small bolt. ‘Fir Tree’ cable ties have a built-in anchor that simply pushes into an existing hole to secure it in place. While their stand-alone mounting base (complete with peel ‘n’ stick adhesive backing) is great for interior applications where drilling holes is not desirable.
Sharp edges are the enemy of all wiring, as it will cut through the insulation creating a short circuit. Never tie wiring hard onto, or across a sharp edge and never pull the harness tight. It needs to have a small amount of slack in it – just not excessive slack.
With any wiring job, don’t rush. Take your time, follow these basic instructions and your next wiring installation will look (and last) like a pro did it!
Related products
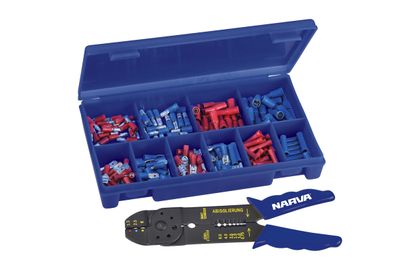
DIY TERMINAL ASSORTMENT
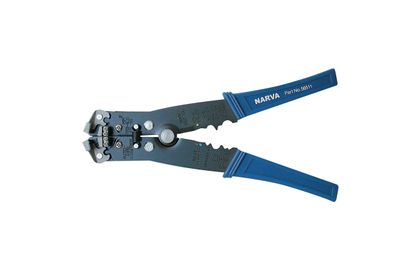
CABLE STRIPPING TOOL (Blister Pack)
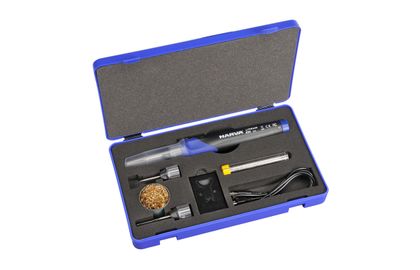
50W Rechargeable Soldering Iron Kit
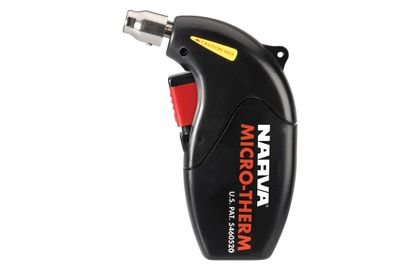
Flameless Heat Gun